Imatest software can automatically detect the image-space location of a number of types of targets, and from these locations determine the appropriate ROI locations for analysis.
These automatic routines are generally sufficient for "well-photographed" images of test charts typical for many image quality analyses, but in some test images there may be factors which confound detection. Such factors may include:
- excessive noise
- excessive blur
- low contrast detection features
- "distracting" background scene
- much larger or smaller detection features than expected
- optical distortion altering the expected shape of detection features
These challenges can be overcome in some cases via user-accessible detection options which assist in tuning the detection routines for the user's specific case. If a module is unable to correctly locate the target in your images, try changing these values to tune the detection for your class of images.
Target Detection Settings window
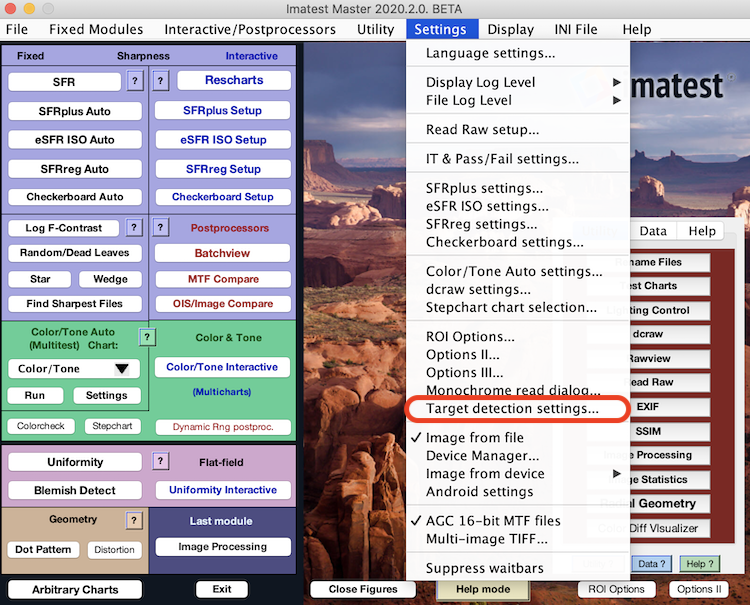
The Target Detection Settings window can be accessed from the Settings menu on the main Imatest window:
Checkerboard
Accessing Detection Settings
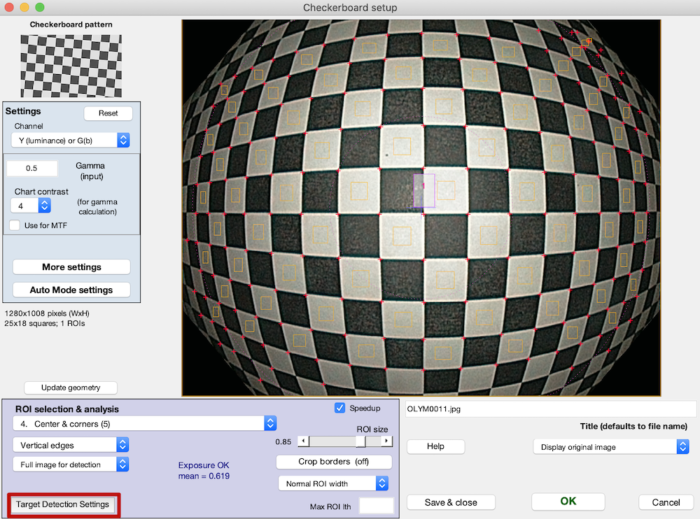
The Target Detection Settings window is accessible from Checkerboard Setup window:
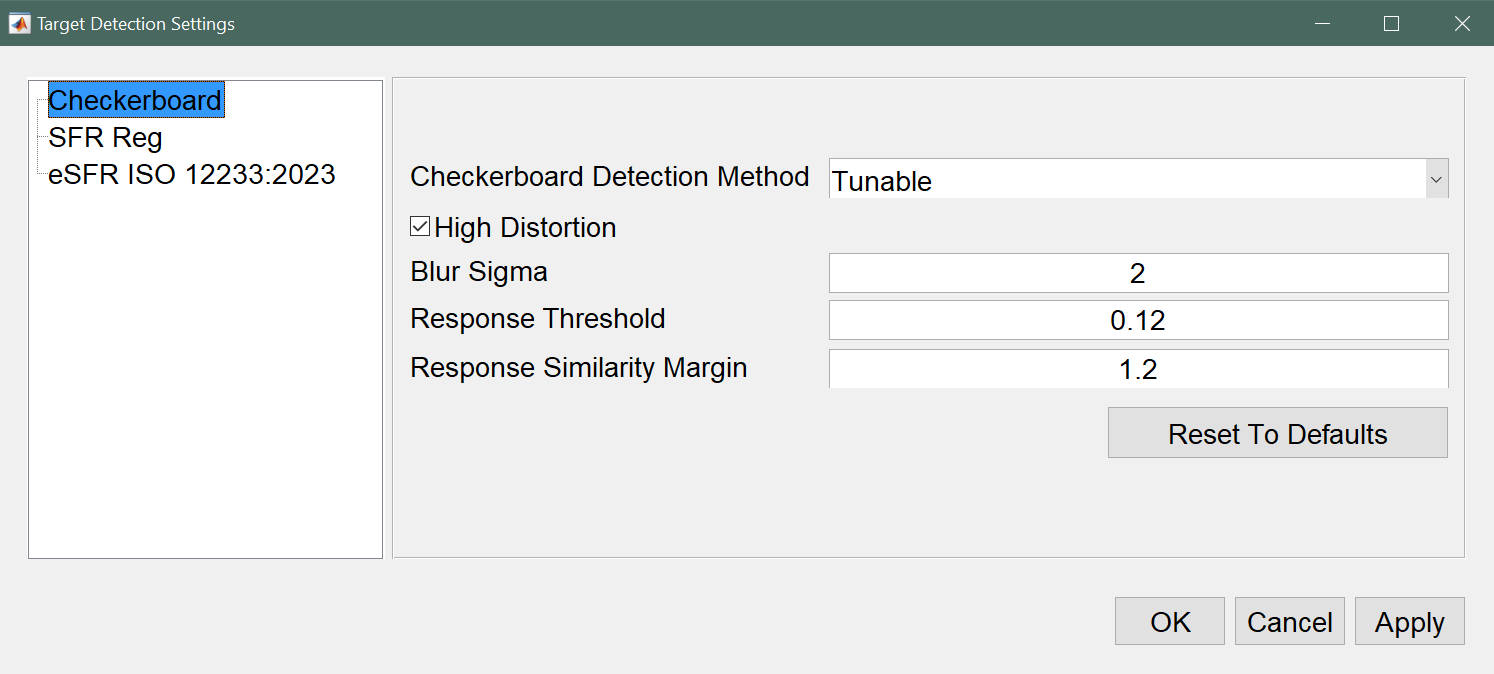
Settings Fields
INI fields are found in the [checkerboard] section.
| Setting Name | Allowed Values | INI Field | Description |
|---|---|---|---|
| Checkerboard Detection Method | MATLAB, Tunable | detectionMethod | Determines which checkerboard detection algorithm is used. MATLAB uses the built-in MATLAB routine, which does not offer further tuning and only returns full rectangular subsets of detected points, meaning points are often not found because they are not in a full row within the image. Tunable is an Imatest proprietary routine which enables the use of the further tuning options. It is also capable of finding target points which are not parts of fully found rows/columns, which can greatly enhance coverage when the target fills the image or in highly distorted images. Default: MATLAB |
| High Distortion | 0, 1 | highDistortion | Enable for highly distorted images (e.g., fisheye distortion). Disable for images that do not contain high levels of distortion. Enabling this option can increase detection robustness for highly distorted checkerboard images. Enabling this option can increase the time it takes for detection to complete. Default: 0 |
| Blur Sigma | [2, inf] | blurSigma | Allowed level of blurriness of the image. Increasing this value may improve detection in instances where failure is due to blurriness in the image, but if this is set too large, points may not be detected at all. Default: 2 |
| Response Threshold | [0, 1] | responseThreshold | Minimum “corner response” required to detect a corner. Decreasing this value may improve detection in instances where failure is due to high blurriness or low contrast in the image. Default: 0.15. |
| Response Similarity Margin | [1, 10] | responseSimilarity | Threshold for acceptance of new points based on corner response relative to other found points. Increasing this value lets more image points pass as meaningful checkerboard corner points.
This may assist in instances where failure is due to non-uniform illumination or high vignetting. Increasing too high could introduce spurious points around the checkerboard, particularly if it does not fill the field of view and there is complicated scenery behind the target.
Default: 1.2 |
MATLAB vs Tunable Detection Coverage
The shortcomings of the MATLAB checkerboard detection's inability to return points which are not part of a full row or column are evident from the following example, with detected points marked in red. The Imatest tunable detection method (with default settings) gets much greater coverage over the image.
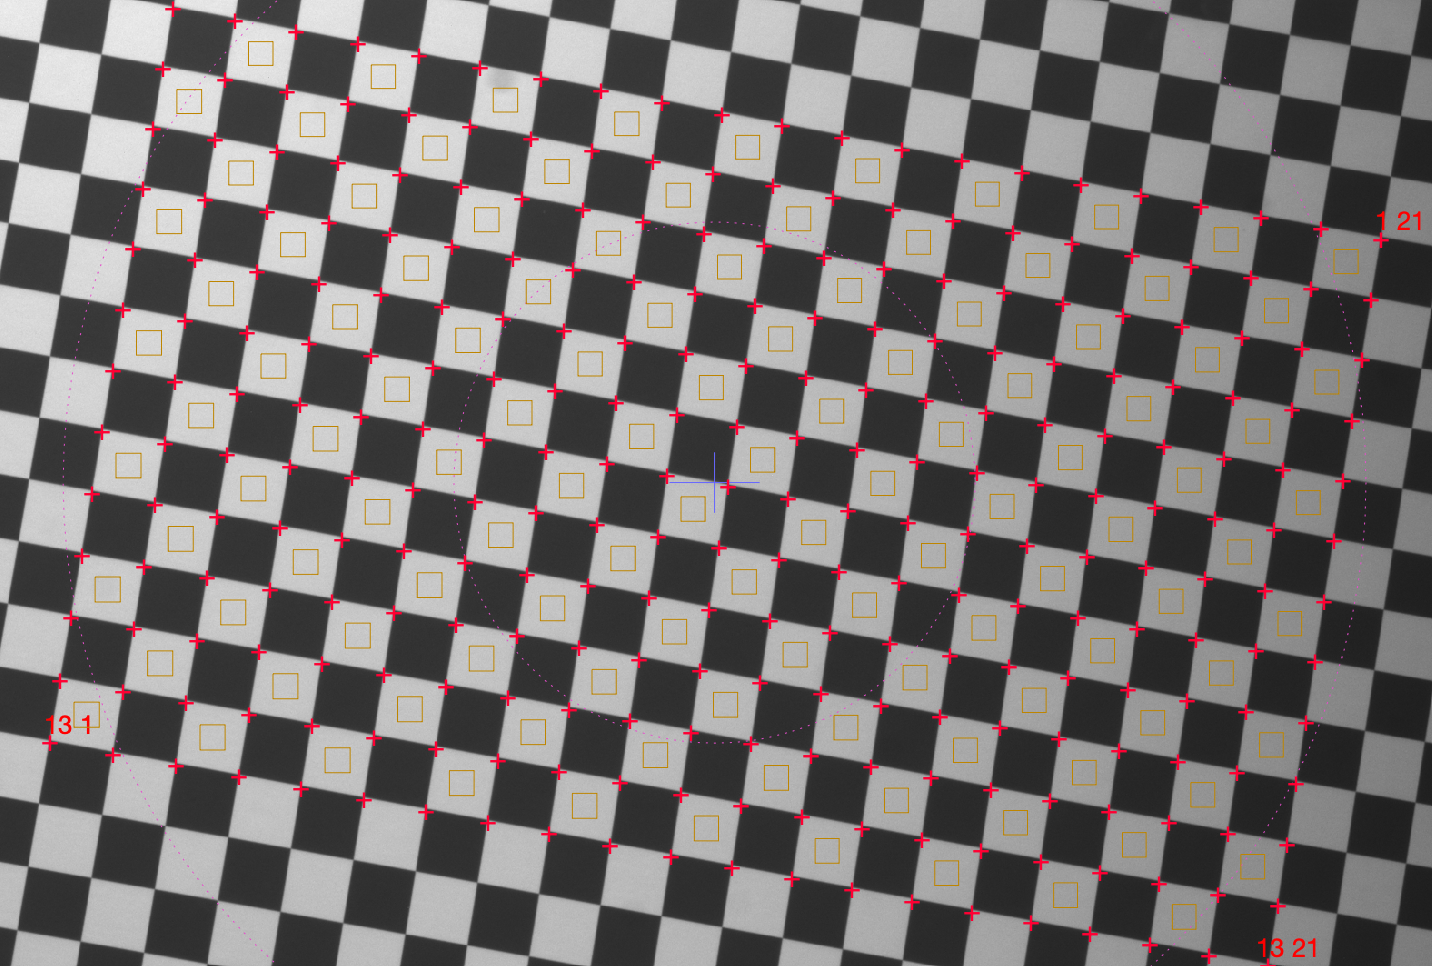 |
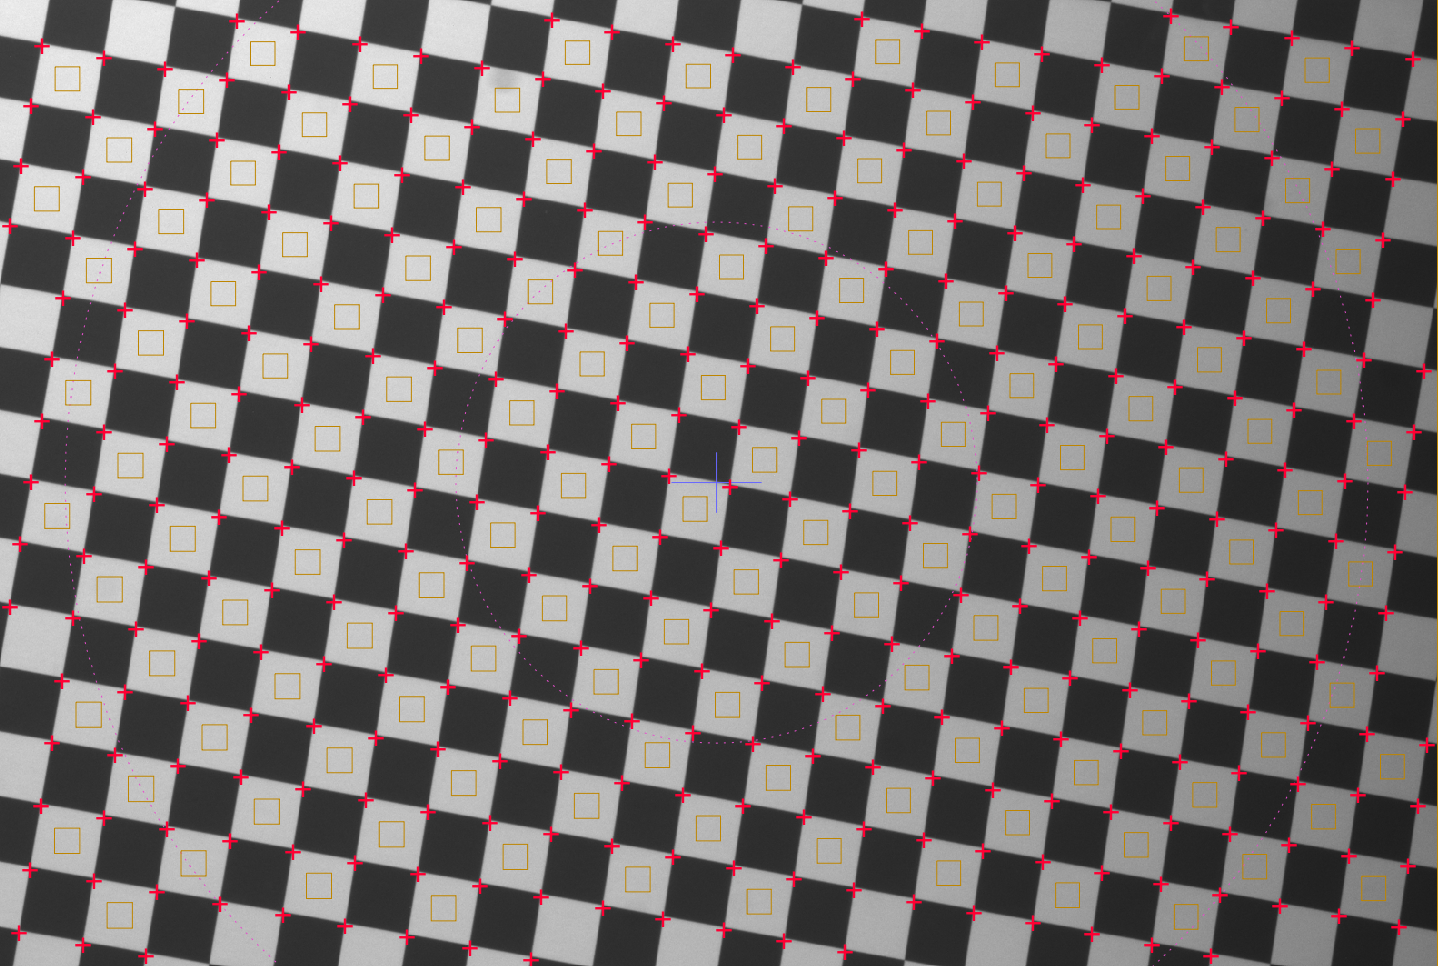 |
In the case of small shifts in camera or chart position, this increased coverage is also more stable because there will not be a transition point when a new full row or column is seen by the MATLAB routine.
SFRreg
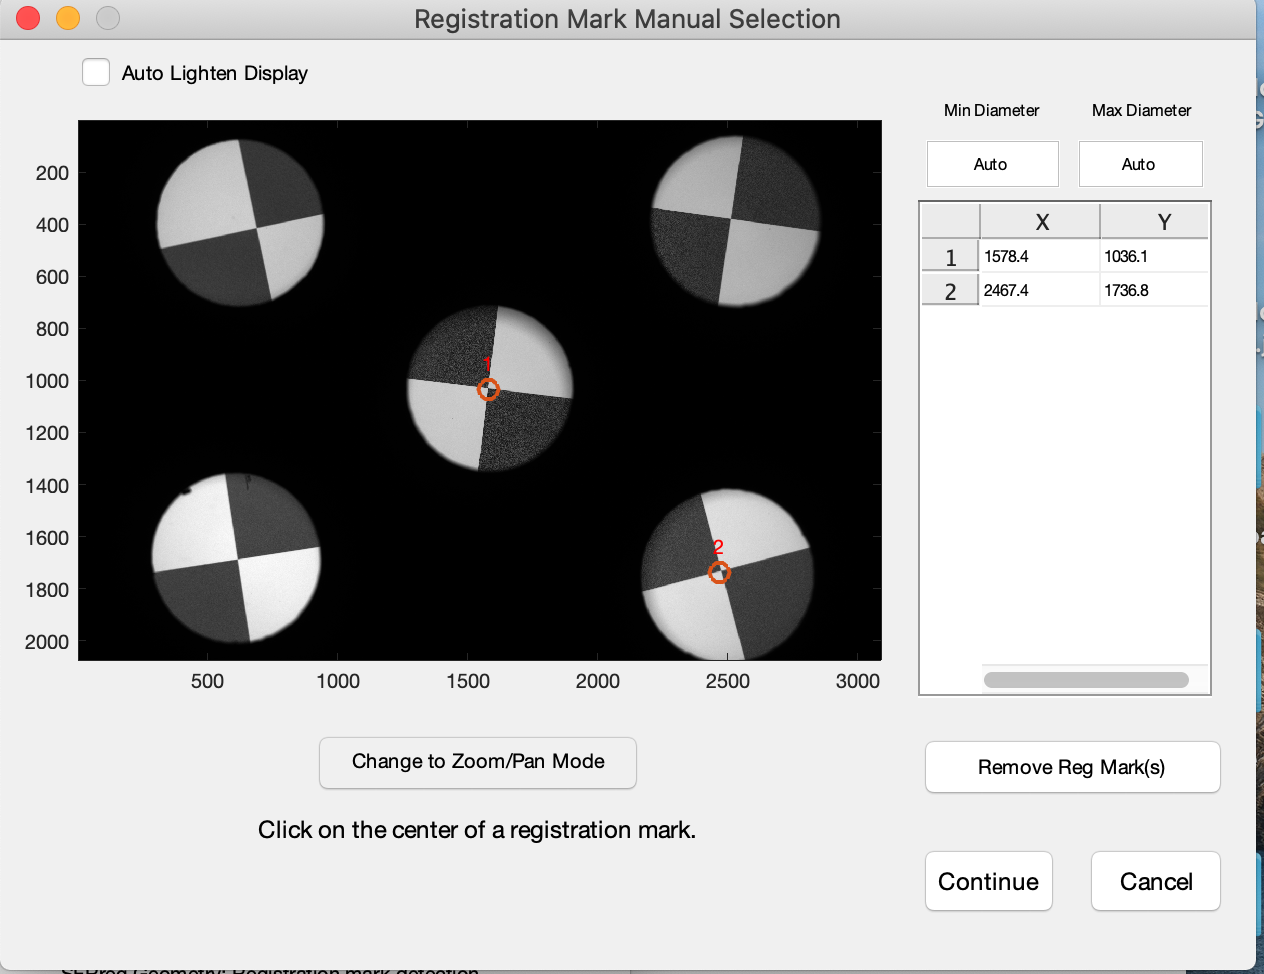
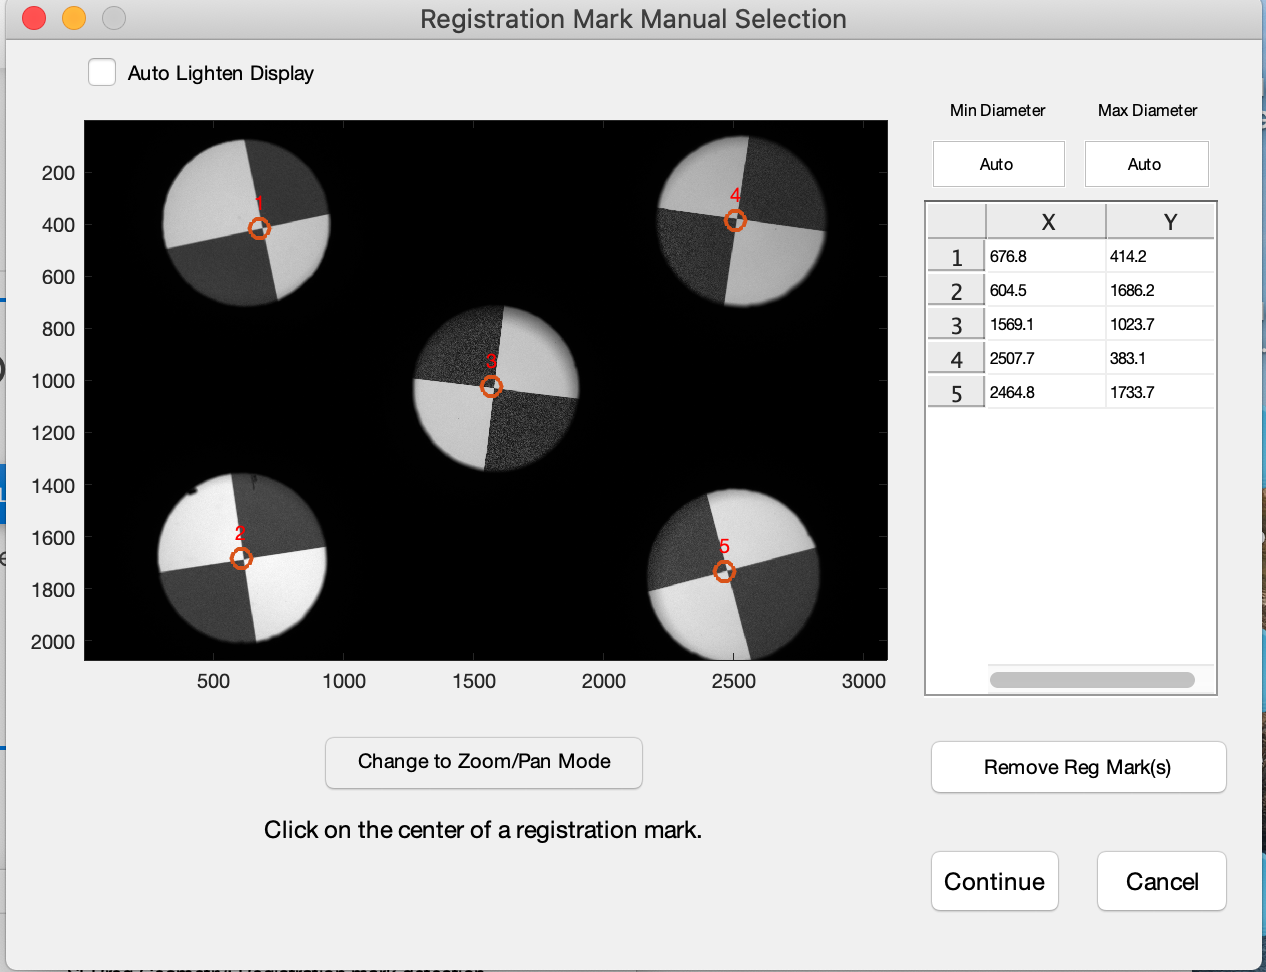
Regmark detection for SFRreg images is significantly improved in Imatest 22.1. It allows the user to indicate the location of Reg Marks. This is especially useful in situations of: low-contrast marks, blurry marks, high noise, or small targets.
Accessing Detection Settings
The Target Detection Settings window is accessible by clicking "Target Detection Settings" at the bottom of the SFRreg Settings window:
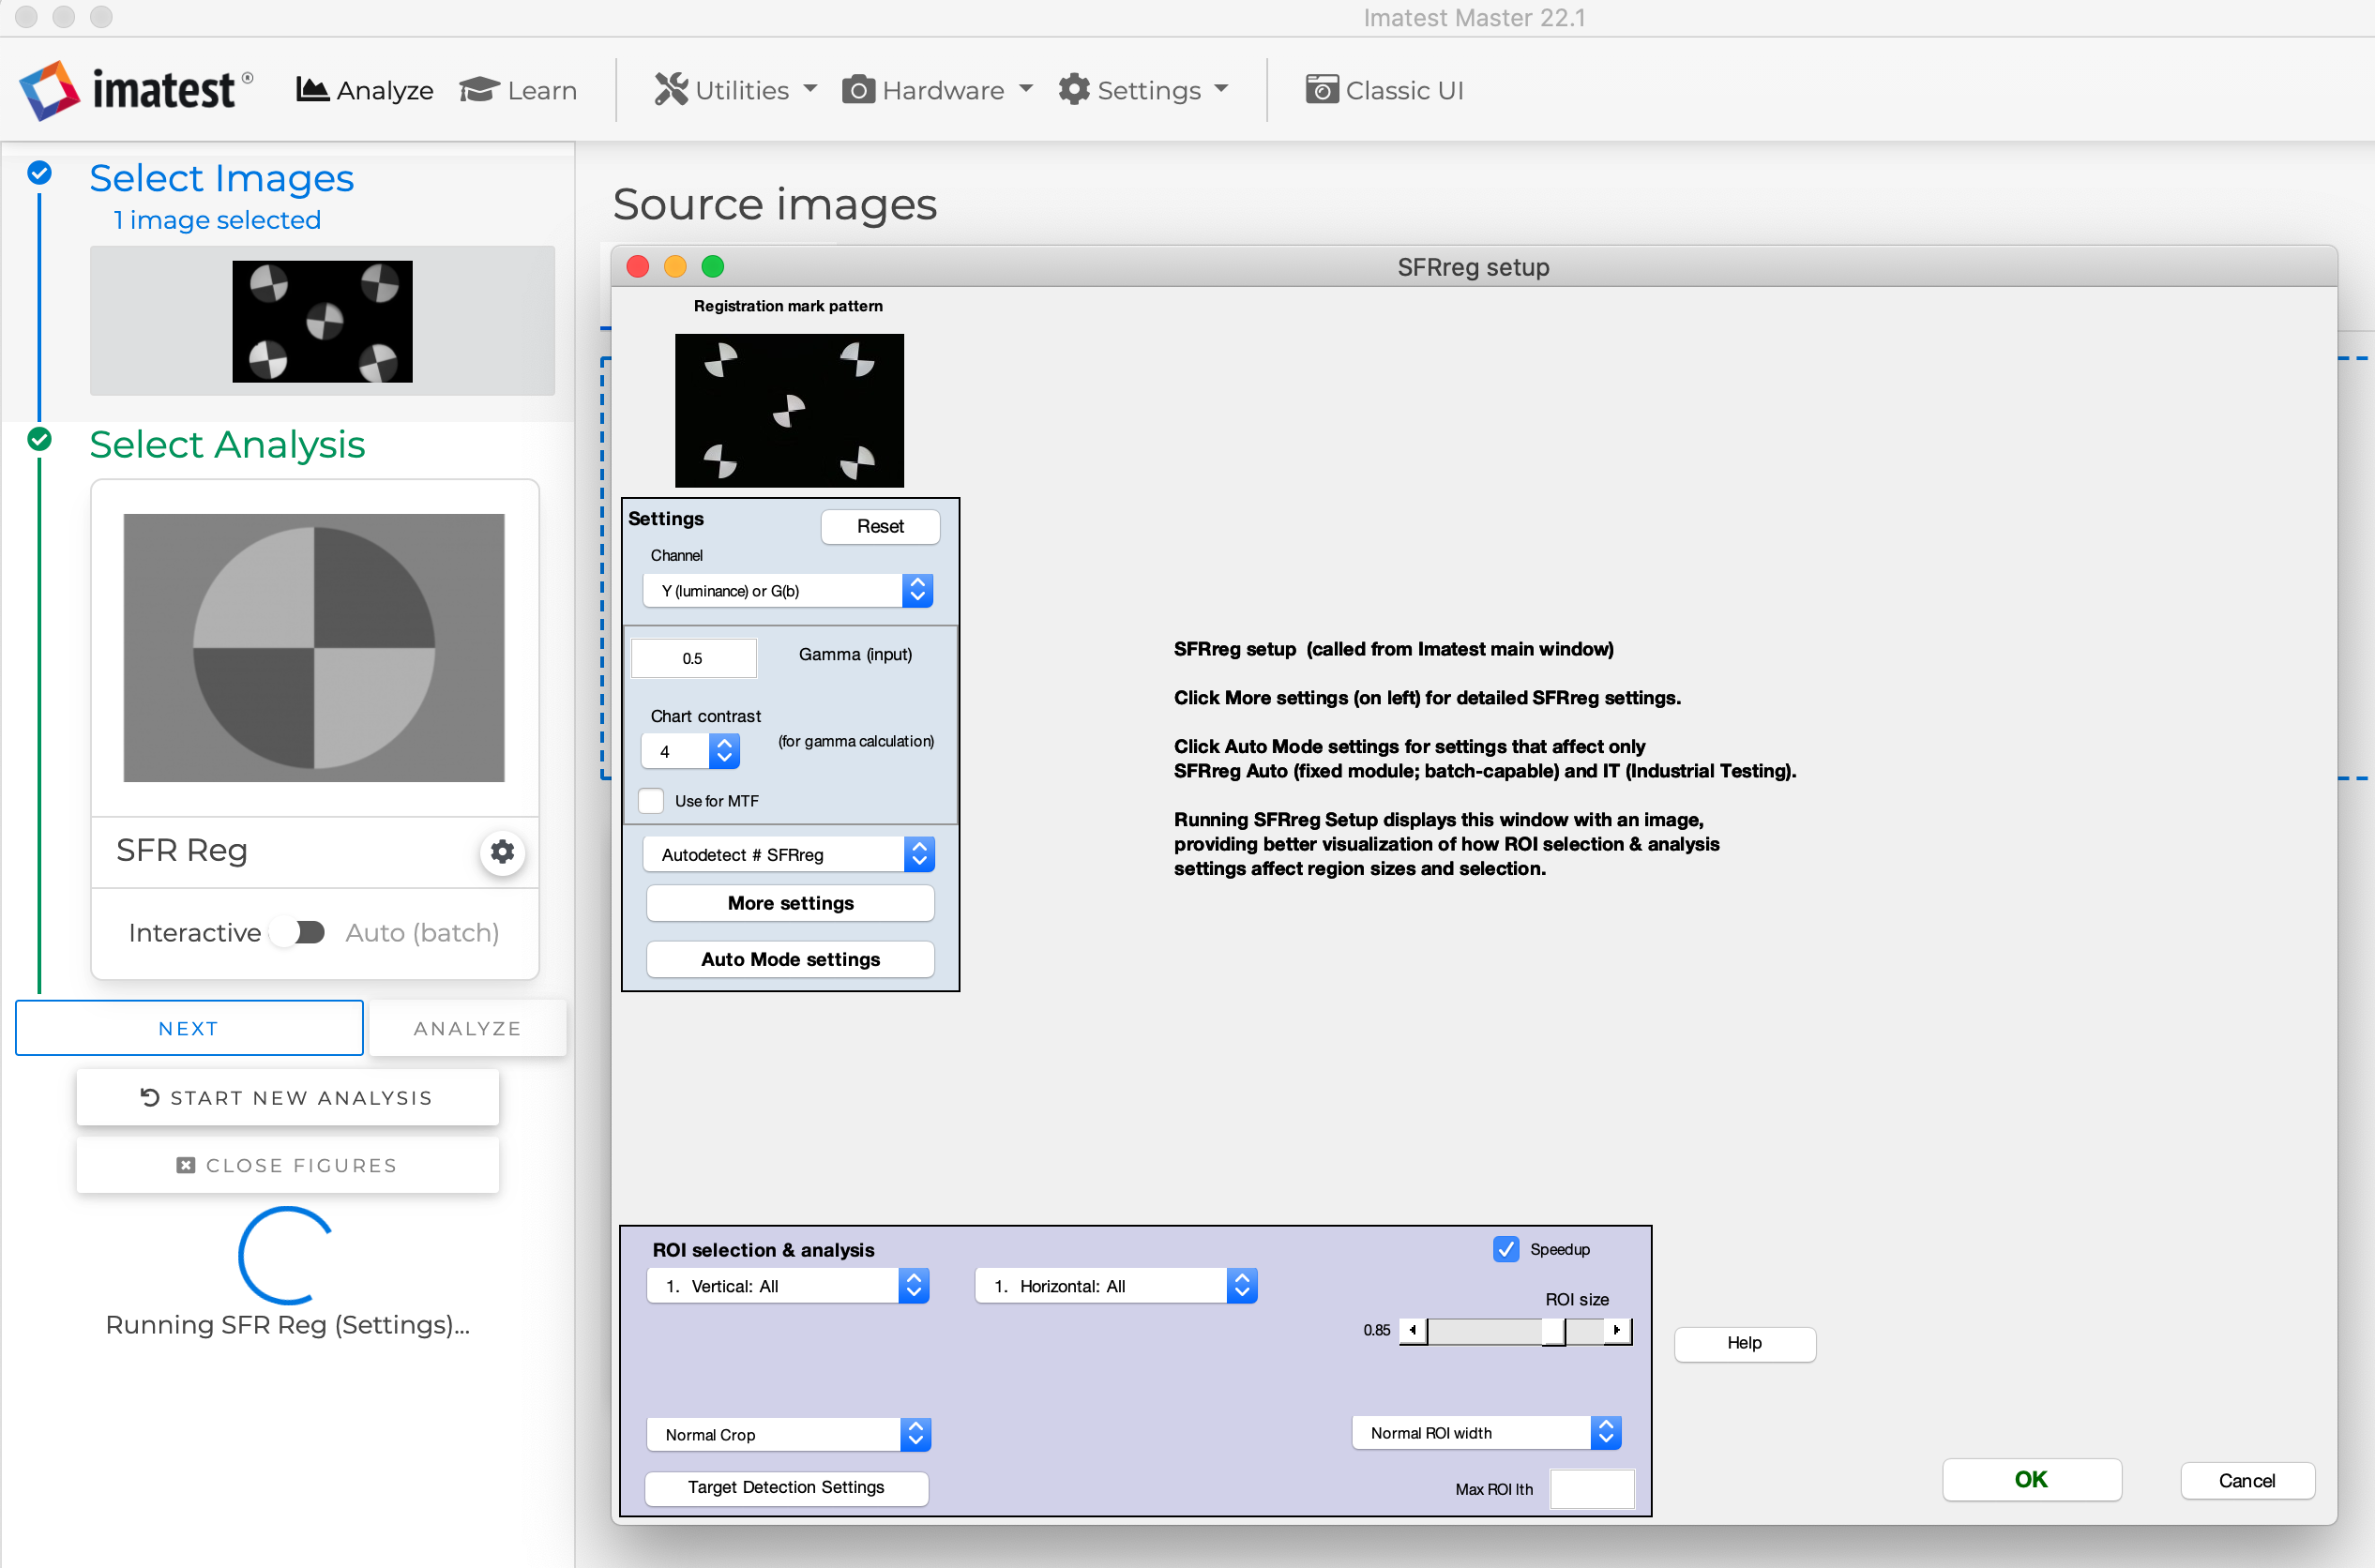
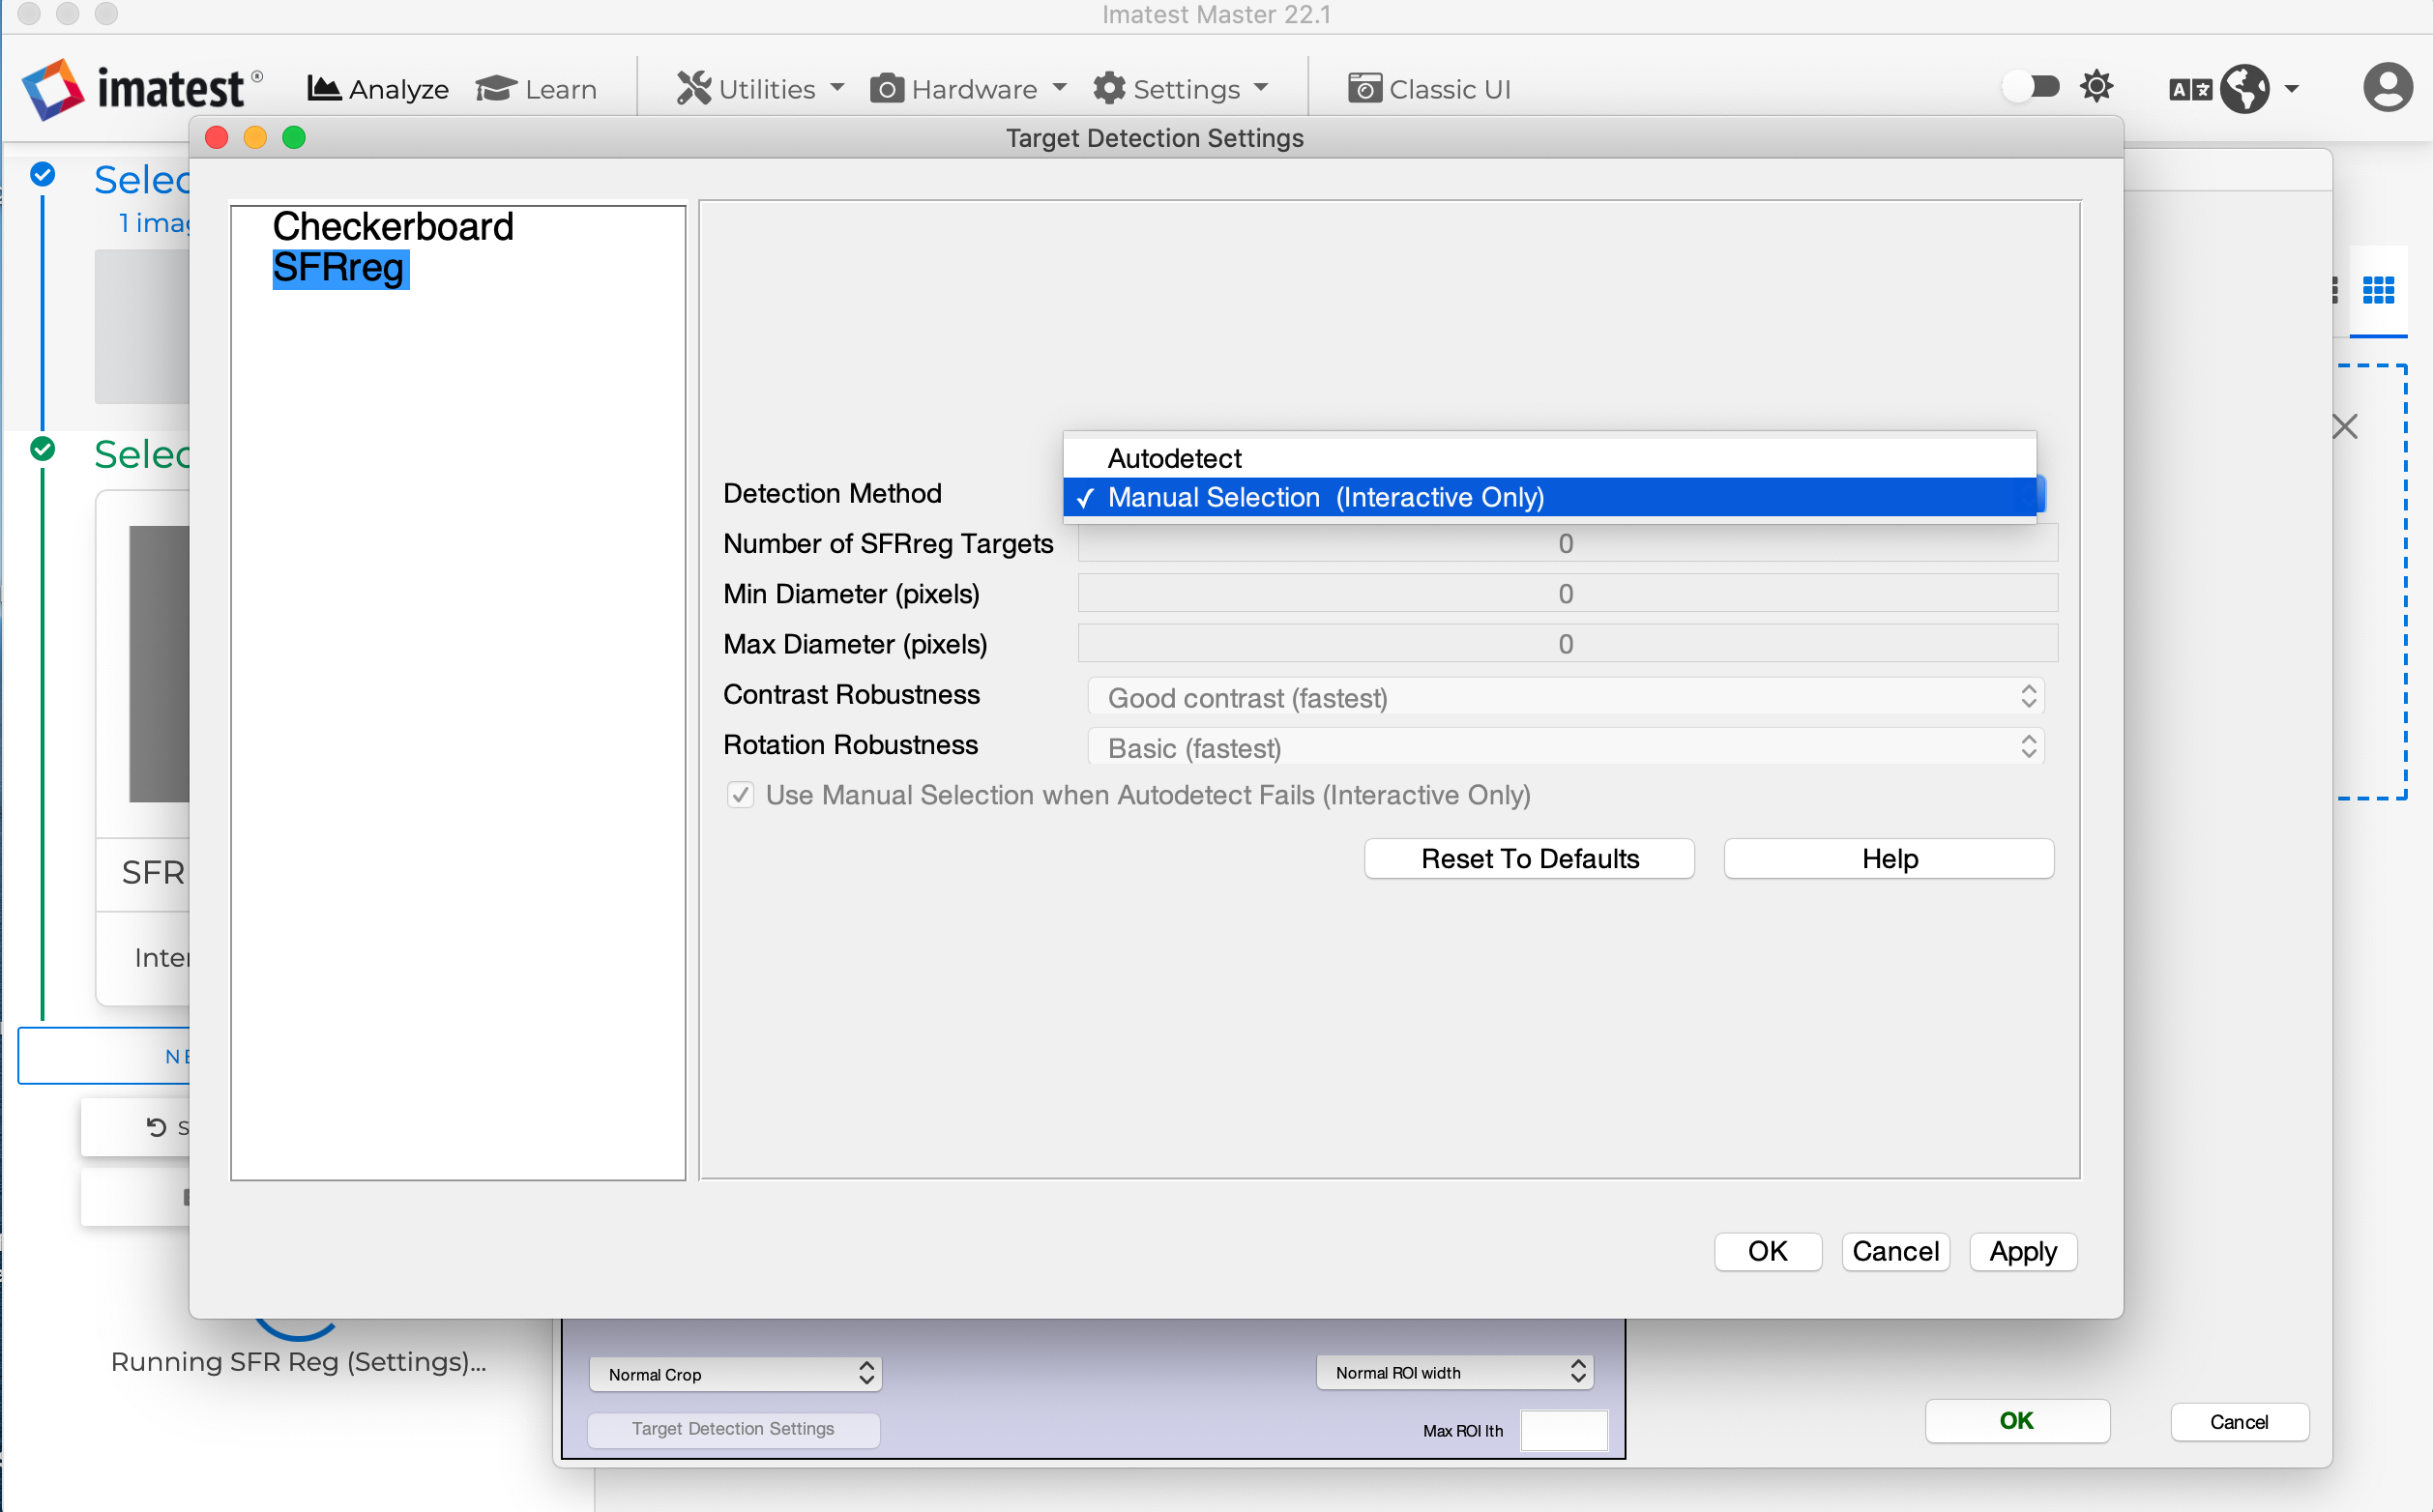
If a target is difficult to detect, choose Manual Selection in the Target Detection Settings window. Then click Ok. Now, when you analyze an SFRReg image in interactive mode, the Regmark Manual Selection window will appear.